A REST API is a structured system that allows apps and services to exchange information over the web. Learn how requests, responses, endpoints, authentication, and errors work—and what to consider when planning API-powered features.
What Is a REST API?
 When you use an app, much of the information you see on the screen comes from external services.
The weather at your destination, a shipment’s status, a product’s price, a booking, or the outcome of a payment: the app often does not manage all this data directly. It requests it from other systems.
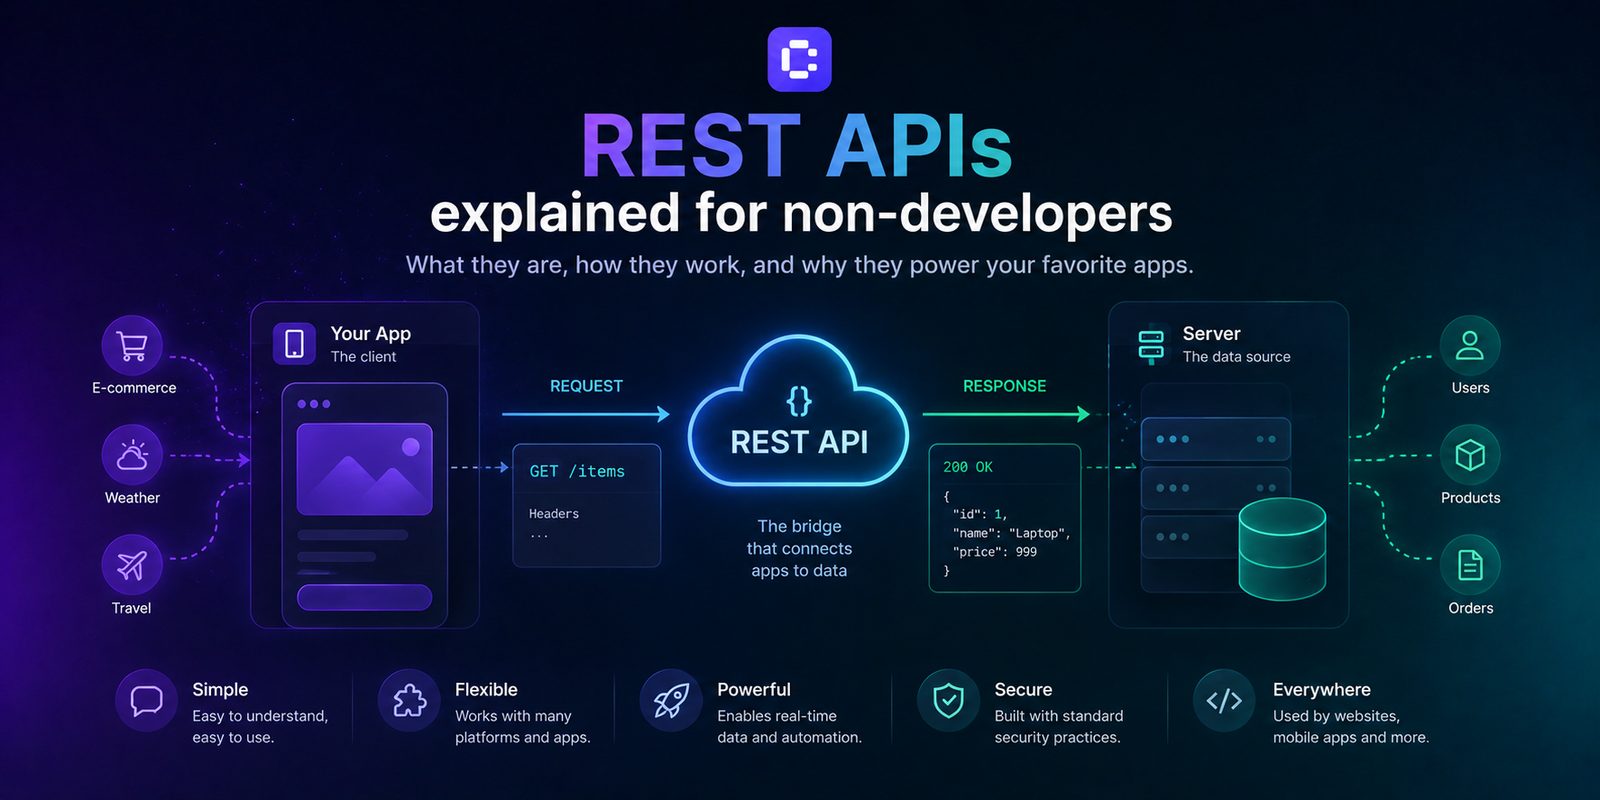
This is where APIs come in. An API allows two software systems to communicate through a defined set of rules. A REST API is one of the most common ways to do this over the web. You can think of it as a structured conversation between applications:
“Give me the information about this product.”
The service responds:
“Here are the name, price, and availability.”
Or:
“Create a new booking for this customer.”
And the service might respond:
“Booking created.”
REST stands for Representational State Transfer. You do not need to remember the acronym to understand how it works. The core idea is simpler: a REST API organizes data into resources—such as users, products, orders, or bookings—and defines a standard way to read, create, update, or delete them.
A Real-World Example
Imagine a travel app that shows the weather at the destination you are about to visit. The app does not necessarily need to collect and update all the weather data itself. It can send a request to a weather service’s API.
The flow looks like this:
Your app → API request → weather service → response → your app
The response might include the temperature, weather conditions, and forecast for the next few days. The user simply sees the weather. Behind that screen, however, two systems are communicating.
The Restaurant Analogy
A simple way to understand an API is to imagine that you are at a restaurant.
- You are the application that wants something.
- The menu describes what you can request.
- The server takes the request and brings back the response.
- The kitchen is the service that does the work.
The API acts as both the menu and the server. It tells you what you can ask for, how to make the request, and what kind of response you can expect. You do not need to know how the kitchen works to order a dish. Similarly, an app does not necessarily need to know how a service is implemented internally to use its API.
How Does a REST API Request Work?
Every API request contains a few essential pieces of information.
Endpoint: Where to Send the Request
The endpoint is the address where the request is sent. For example:
https://api.example.com/products/42
This might represent the product with ID 42. Different endpoints can represent a collection of resources, a single item, or a specific operation.
HTTP Method: What You Want to Do
The HTTP method tells the service which operation you want to perform. The most common methods are:
- GET → retrieve information;
- POST → create a new resource;
- PUT or PATCH → update an existing resource;
- DELETE → delete a resource.
For example, on a booking platform:
GET /bookings
might retrieve bookings, while:
POST /bookings
might create a new one. These are widely used conventions, but they are not an absolute guarantee. The API documentation is always the definitive reference.
Headers and Body: Additional Information
Headers contain supporting information for the request, such as the data format or the credentials used for authentication. The body, meanwhile, contains the data needed to perform the operation. For example, if you want to create a booking, the body might contain:
{
  "service": "Consultation",
  "date": "2026-09-15",
  "time": "14:00"
}
This data is often represented in JSON, a widely used format because it is structured and easy for both people and software to read.
What Happens When the Response Arrives?
After receiving the request, the service processes it and returns a response. The response generally contains the requested data or the result of the operation, along with an HTTP status code indicating what happened. The most common codes fall into three broad categories.
200–299: Everything Is OK
The request was handled successfully. For example:
200 OK→ request completed;201 Created→ new resource created.
400–499: Something Is Wrong with the Request
The issue usually concerns the request itself or the client’s permissions. For example:
400 Bad Request→ invalid data;401 Unauthorized→ missing or invalid authentication;403 Forbidden→ the user does not have the required permissions;404 Not Found→ the requested resource does not exist.
500–599: Server-Side Problem
The service responsible for handling the request encountered a problem.
For users, however, a code such as 409 or 500 does not mean much.
A good application therefore turns the technical error into a clear message:
“This appointment is no longer available. Choose another time.”
is much more helpful than:
“HTTP 409 Conflict.”
REST APIs, Databases, Webhooks, and GraphQL: What Is the Difference?
These technologies and concepts are related, but they serve different purposes.
REST APIs and Databases
A database stores information. An API, on the other hand, defines how other systems can interact with that information. For example, a database might contain:
- users;
- products;
- orders;
- bookings.
The API can determine which data can be read, created, or updated—and by whom. This creates a layer of control between the application and the data. Connecting a browser directly to a database without adequate safeguards could expose information or operations that should remain private. In Coderblock, the agent can design and apply a Postgres database schema through conversation. Standard web apps use a dedicated Supabase project with Postgres, Auth, Storage, and Row Level Security. The Backend section also lets you view tables, authenticated users, storage, and functions.
REST APIs and Webhooks
APIs and webhooks work in different directions. With a standard API request, your application asks for something:
“Was the payment successful?”
With a webhook, another service proactively tells your application that something happened:
“The payment was just completed successfully.”
Webhooks are especially useful for events that happen later, such as payments, shipment updates, or changes to an order’s status. However, they must be verified and handled securely. In Coderblock’s managed Stripe flow, the platform can handle webhook configuration. In BYOK mode, the agent securely requests the Stripe secret key and configures the webhook automatically.
REST and GraphQL
REST and GraphQL are two different approaches to communication between applications. With REST, you typically work with multiple endpoints representing different resources. GraphQL instead uses a query interface through which the client can specify exactly which data it wants to receive. GraphQL can be particularly useful when data requirements are complex and the client needs greater control over the response. REST, on the other hand, is widely used and often easier to understand. However, neither approach is universally better. The right choice depends on the service architecture, product requirements, team, and type of client that will use it.
Authentication and Authorization Are Not the Same Thing
Two concepts are often confused: authentication and authorization. The difference is simple. Authentication:
“Who are you?”
Authorization:
“What are you allowed to do?”
Imagine a platform with customers and administrators. Logging in verifies that you really are a particular user. But that does not automatically mean you can view all the data in the app. A customer might be able to see their own bookings. An administrator might be able to see every customer’s bookings. The underlying identity is the same type of information, but the permissions are different.
What About API Keys?
An API key often identifies the application or service making a request. An authenticated session, on the other hand, can identify the user who logged in. Neither should be treated as a universal pass.
Permissions must be defined separately and enforced on the server or database side as well. In Coderblock, you can ask directly in the chat:
“Add login and user accounts.”
The agent can configure Supabase Auth, sign-up and login pages, session management, protected routes, and Row Level Security linked to the authenticated user. Apps also include a basic structure for profiles and roles. This means you do not need to create a password table manually or implement authentication logic from scratch.
Where Should API Keys Be Stored?
Private credentials are another critical consideration. A secret API key should not be placed in the frontend, published on GitHub, or stored in a field users can access. When a Coderblock project requires a secret, the agent can collect it through a secure request for environment variables. The value is stored in the project’s server-side secrets store and is not added to the frontend code or the conversation.
How to Design a Feature That Uses an API
When building an app with an AI builder, you do not need to start with the technology. Start with the outcome you want for the user. “Show customers the delivery status of their order” is more useful than:
“Add an API.”
From there, you can define what is needed.
1. Identify the Data Source
Which system contains the correct information? Your database? An external service? Stripe? A shipping management system? There must be a clear source of truth.
2. Check the Documentation
Before integrating a service, check:
- the available endpoints;
- authentication methods;
- test environments;
- usage limits;
- request and response formats;
- whether webhooks are supported.
3. Plan for Errors
What happens if the external service is slow? What if it is temporarily offline? What if it returns incomplete data? A well-designed app needs defined behavior even when an API does not respond as expected.
4. Validate Incoming and Outgoing Data
Do not assume that everything received from an external service is always correct. Data must be validated before it is used or stored.
5. Limit Permissions
An integration should only have the access it actually needs. If a service needs to read payments, that does not necessarily mean it should also be able to modify them.
6. Protect Secrets
Private credentials must remain on the server side. The browser should never receive an API key that can perform restricted operations.
7. Test Before Going to Production
Whenever possible, use the service’s test environment. Test not only successful operations but also rejected requests, errors, timeouts, duplicates, and cancellations.
8. Avoid Unnecessary Requests
Not all information needs to be requested every time a page loads. When the data allows it, caching can reduce response times, the number of requests, and integration costs.
Working with APIs in Coderblock
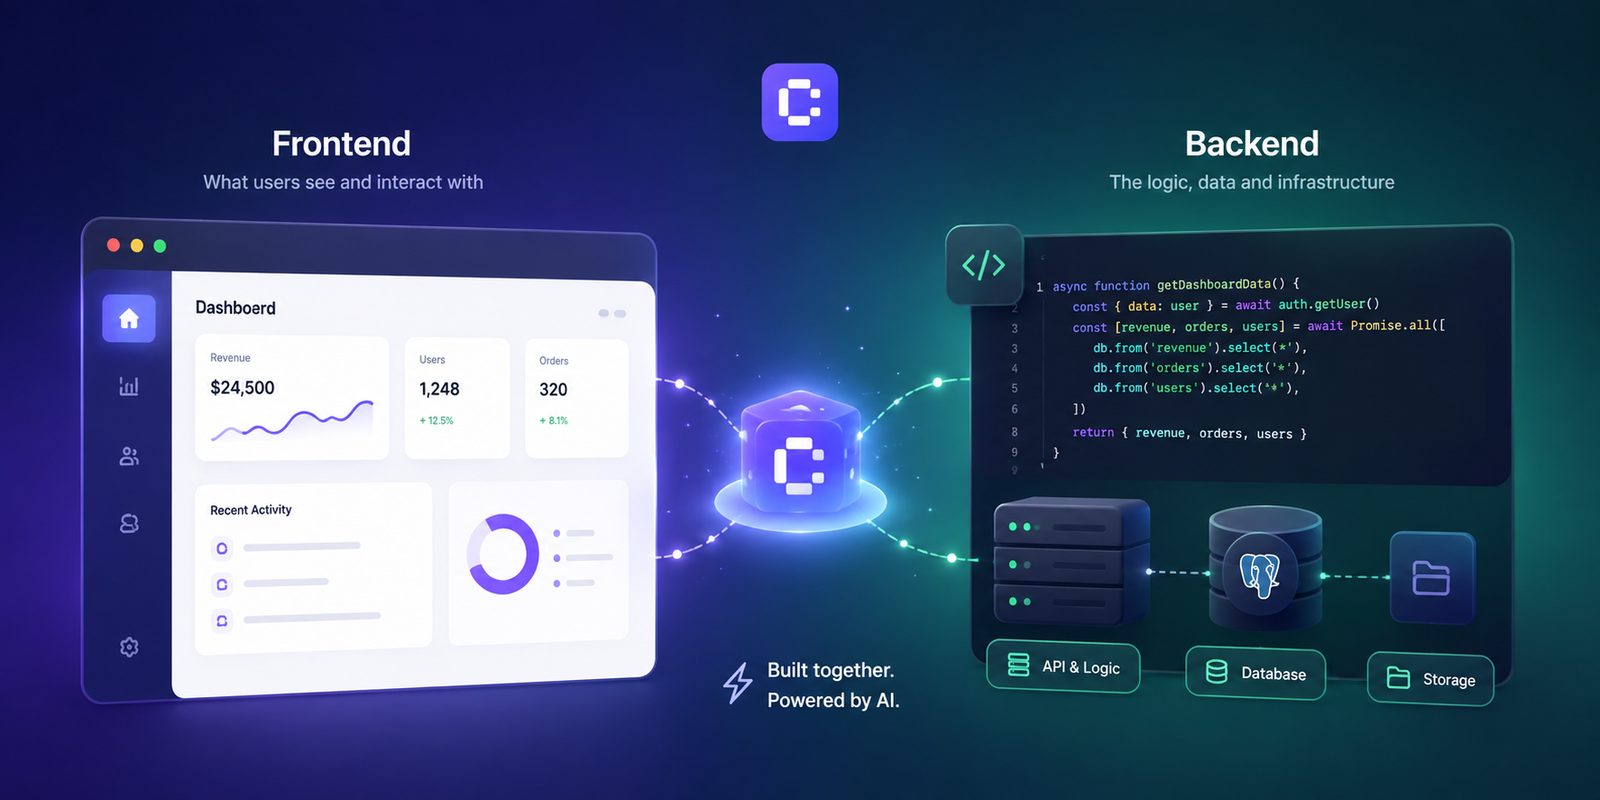
With Coderblock, APIs become part of the same conversational workflow used to build the rest of the app. You can start with an idea or a product template and ask the AI to create the frontend, backend, and database.
When you want to add an integration, it helps to describe the behavior you want. For example:
“Add account access. Each customer should only be able to see their own bookings. If the external scheduling service is unavailable, show a clear message and let the user try again.”
A request like this communicates not only which technology to use, but more importantly what should happen in the app.
The agent can handle the underlying implementation while you review the result in the live preview at coderblock.dev and continue refining it through chat.
Why Understanding APIs Is Useful Even If You Cannot Code
You do not need to be a developer to understand the concept of a REST API. But knowing the basics changes how you design an app. It helps you understand why a Stripe integration is different from connecting to a database, why a webhook is different from a standard API request, and why an API key should never be exposed in the frontend. Most importantly, it helps you write better prompts for the AI.
Instead of simply asking:
“Add an API.”
you can describe what should happen, which data should be used, who can access it, and what should happen when something goes wrong. The AI can handle much of the technical complexity.
But the more clearly you can describe the behavior you want, the more control you have over the product you are building.